360Works MirrorSync can sync data between FileMaker Server and SQL databases which makes platforms like WordPress, powered by PHP and MySQL, an ideal candidate.
The objective of this content is to provide you with a comprehensive overview of the steps you need to set up this synchronization, based on the video tutorial we have available. The video is embedded at the bottom of this article and will provide you with additional details and visuals you may need.
If this is your first time using MirrorSync, we have documentation you may want to review before getting started with setting up your first sync:
Basic and Advanced Setup Topics
When you are ready to begin, the following 5 steps will guide you in a successful configuration of a FileMaker and WordPress sync using MirrorSync.
Step 1: Prepare your FileMaker database
To begin you must have your FileMaker database hosted on FileMaker Server. You can either create a new FileMaker database or use an existing database. Please note, it is best to follow this guide with a FileMaker database that has no existing WordPress tables. During the course of this setup, MirrorSync will be adding new tables to the FileMaker database to store the WordPress tables.
Note: It is possible to sync with existing WordPress tables, but it is easiest to let MirrorSync set the new tables for you. Please contact us if you would like to use existing tables in your synchronization, as there are additional steps involved.
Step 2: Begin the MirrorSync setup using the configuration utility
MirrorSync has always been known for its simple setup process. You will use this signature guided setup utility to configure. In this guide, you can begin by setting up the Hub as the MySQL database where your WordPress data is stored. The Spoke will be set up as the FileMaker database. This is the model you will choose if you are mainly working in WordPress, and simply want to pull data into FileMaker. Alternatively, if you mainly work on the FileMaker end you can reverse this setup and set your MySQL database up as the Spoke instead. If you have questions about this, please contact us.

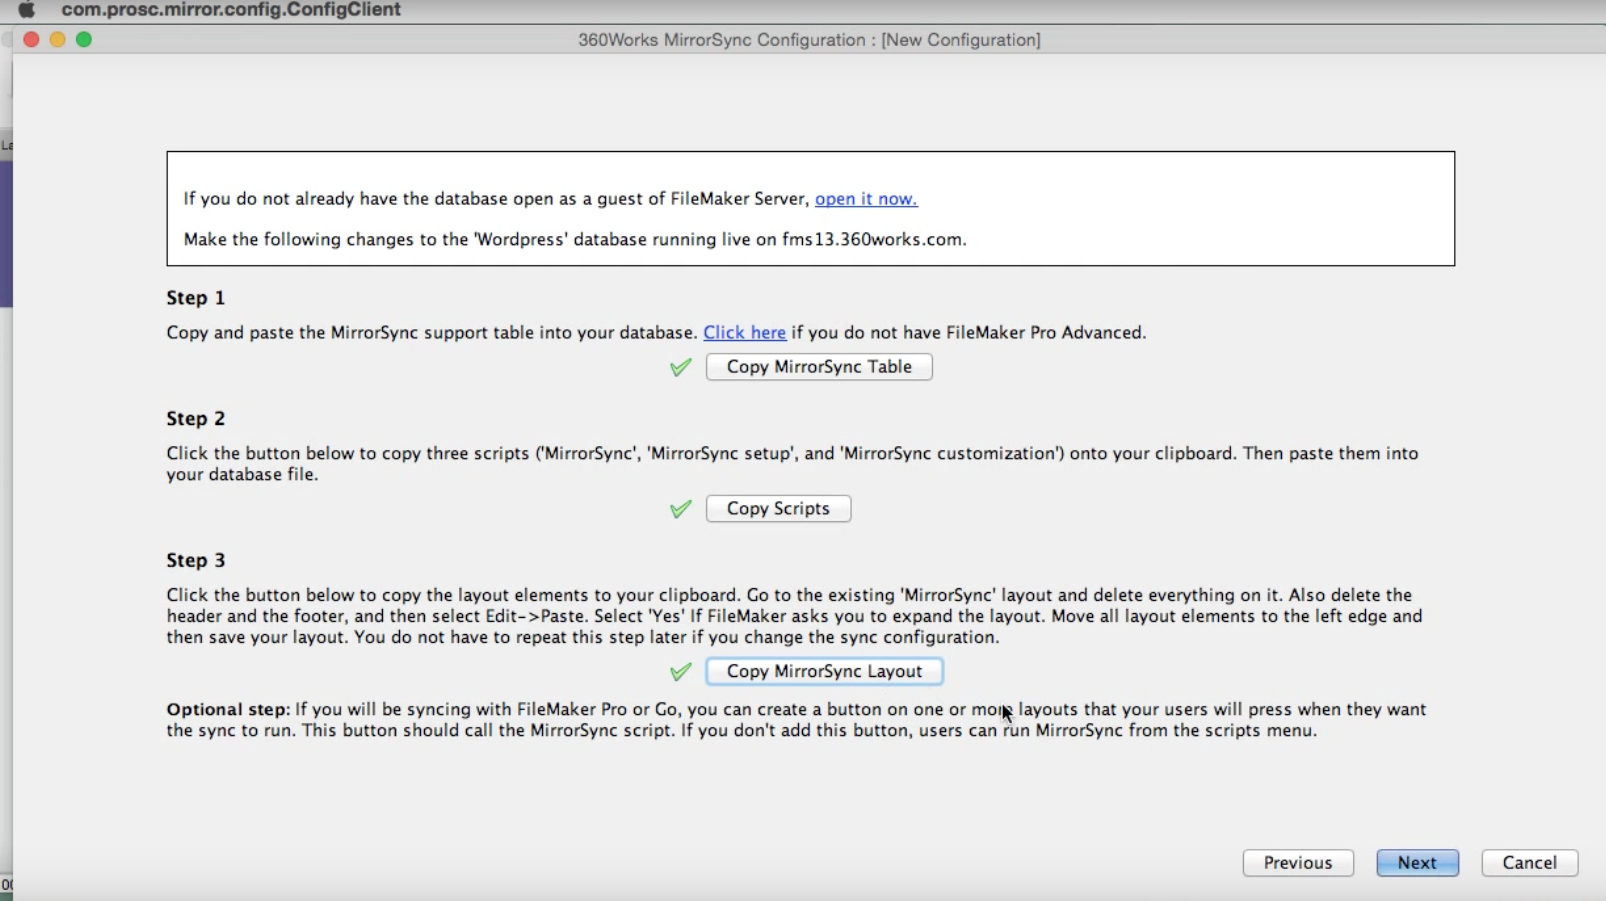
Next, the configuration tool will guide you in 3 simple steps for copying the MirrorSync table, scripts, and layout into your FileMaker database.

After these steps are completed, the configuration utility will prompt you to create sync layouts for your FileMaker database. Because you are pulling in tables from MySQL, you will skip this step.

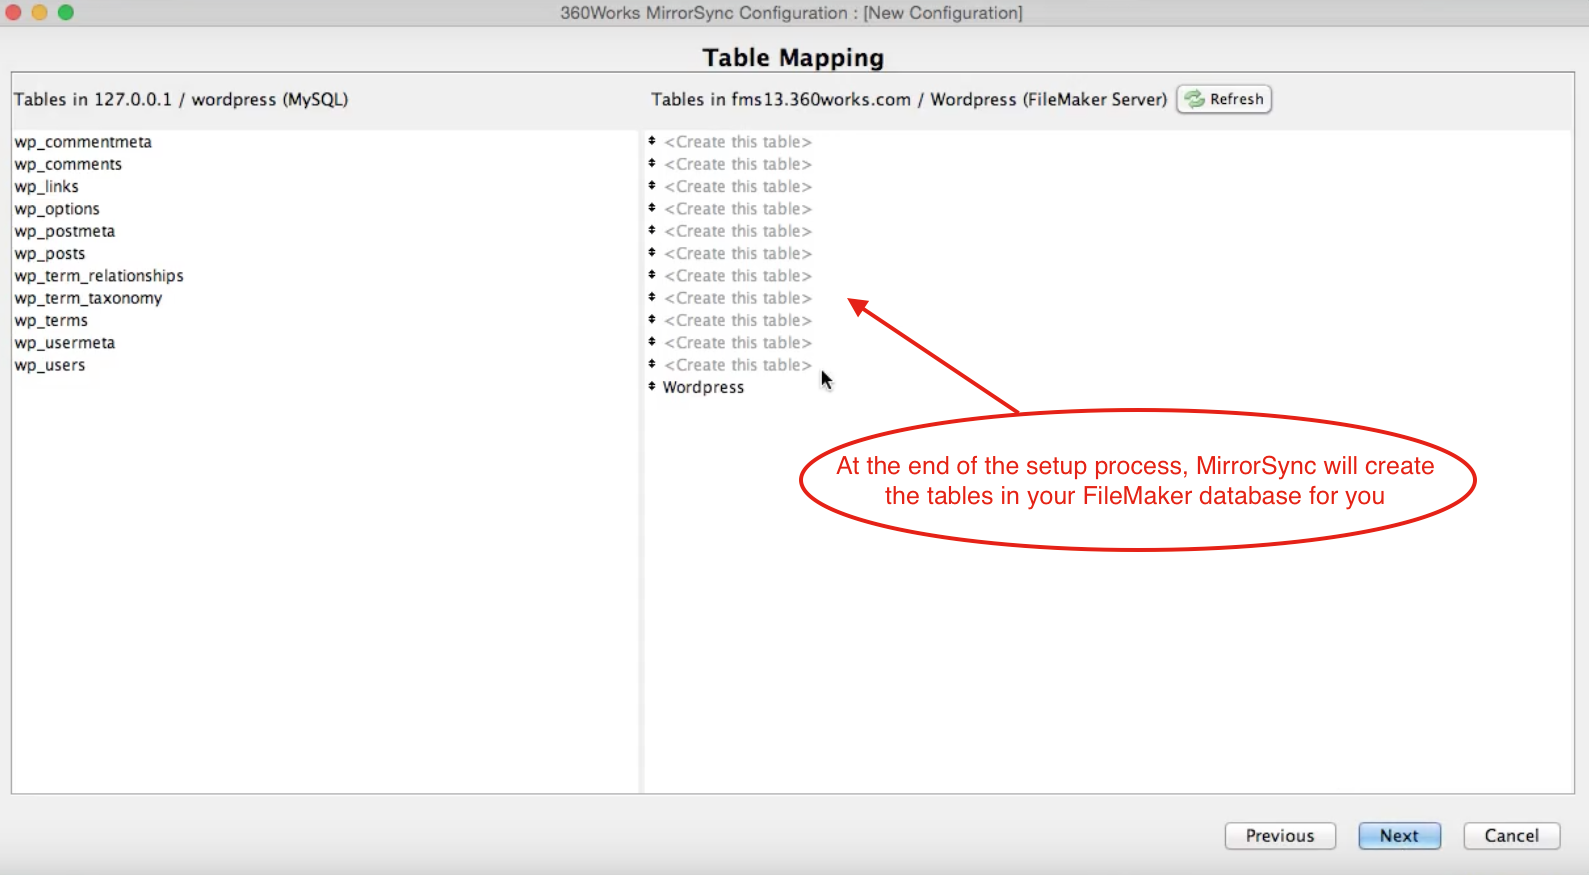
As we mentioned previously, you should not have any existing WordPress tables in your FileMaker database. MirrorSync will create the tables for you.

Step 3: Add Modification and Creation Timestamps for MySQL
By default, WordPress does not have a Modification Timestamp on all tables. When you arrive at the MySQL configuration window, create a new Modification Timestamp field and a new Creation Timestamp field for all tables.

Step 4: Set up Foreign Key Mapping
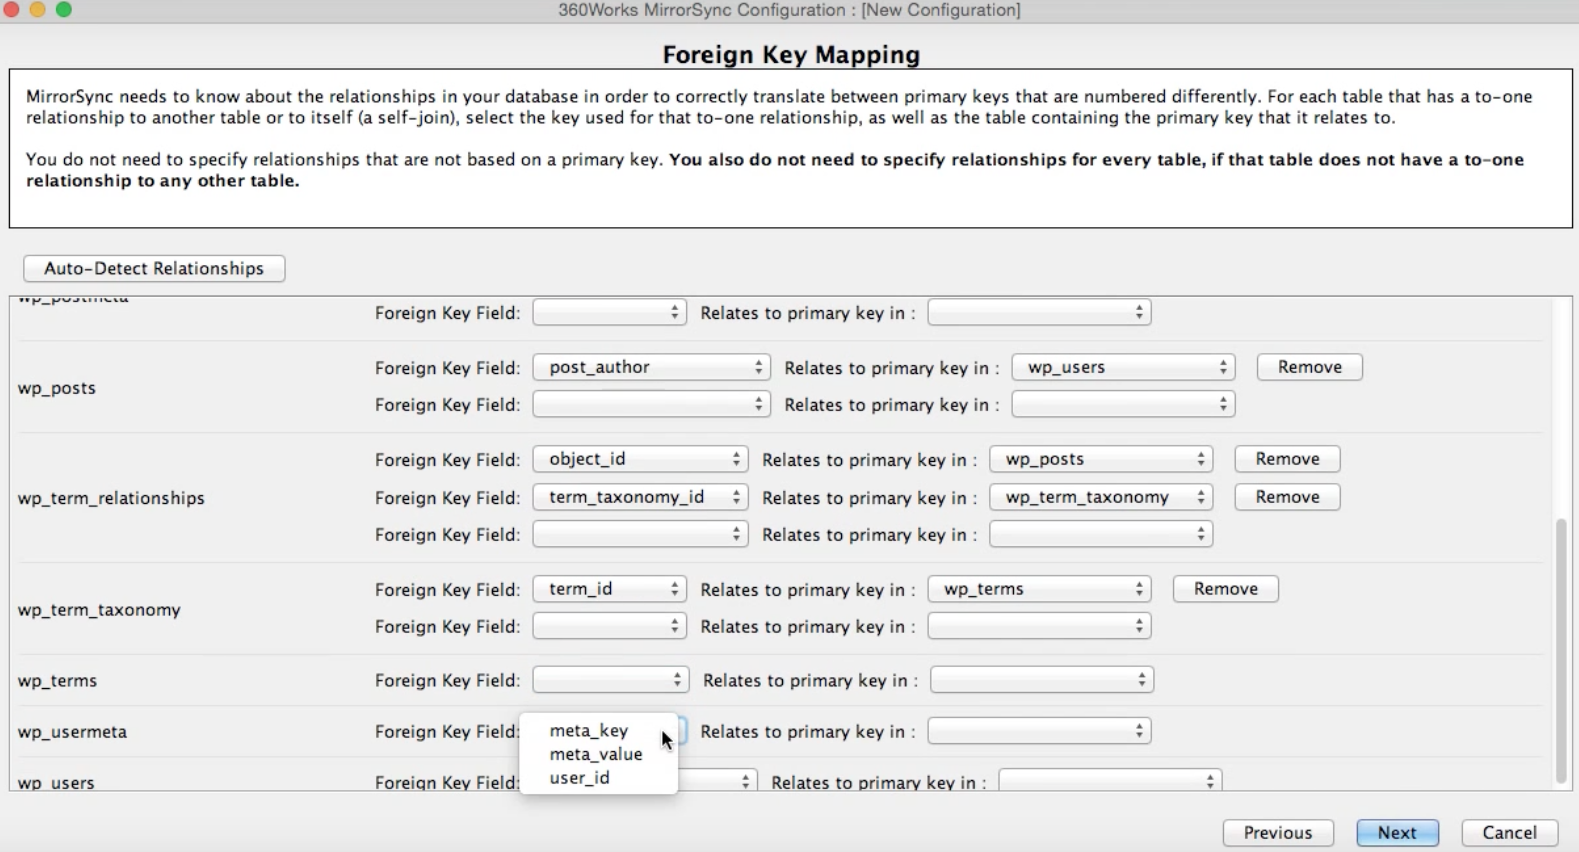
At this part of the configuration, MirrorSync needs to know what the foreign keys are between the tables in your MySQL database. So let's fill MirrorSync in on the action!
In the video tutorial, Jesse explains that he accessed the list of foreign keys needed from the database schema documentation on the WordPress website. You can follow along with him in this portion of the setup video to breeze through this step. If you are only following along with the 5 written steps in this article, here is a list of the foreign keys you will need:
wp_commentmeta:
comment_id -> wp_comment
wp_comments:
user_id -> wp_user
comment_post_ID -> wp_posts
wp_postmeta:
post_id -> wp_post
wp_posts:
post_author -> wp_user
post_parent -> self
wp_term_relationships:
object_id -> wp_post
term_taxonomy_id -> wp_term_taxonomy
wp_term_taxonomy:
parent -> self
term_id -> wp_term
wp_usermeta:
user_id -> wp_user

Step 5: Paste tables. Paste scripts. Sync!
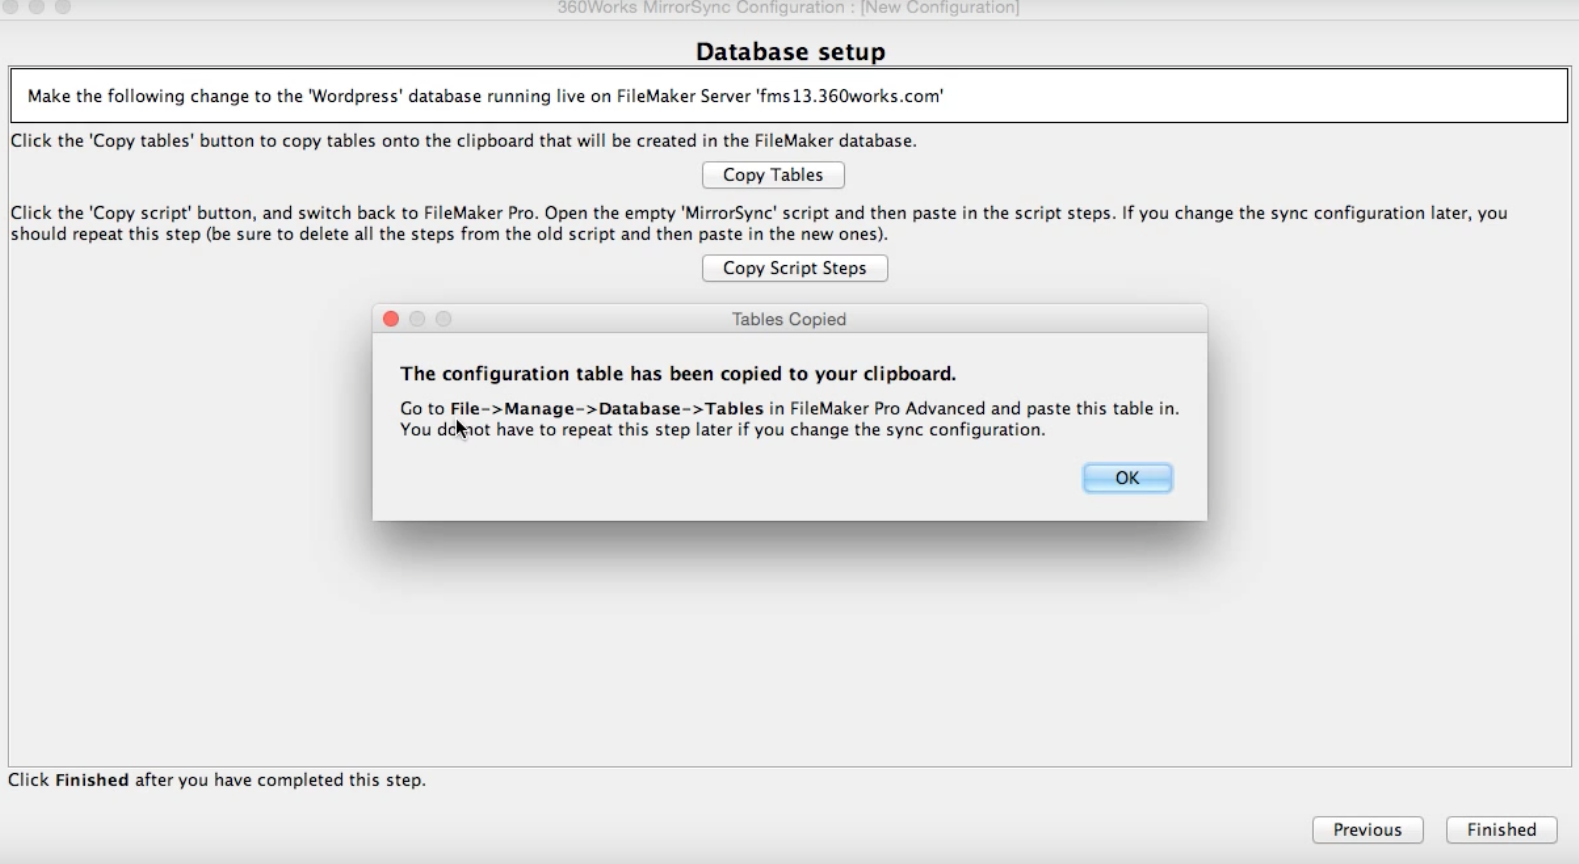
After you confirm the relationships are correct, MirrorSync will copy the tables to your clipboard and you will paste this into your FileMaker database. This is the part we mentioned earlier, where MirrorSync will create the tables for you with the metadata for the fields already properly configured with the MySQL data.
Next, you can go back into the MirrorSync configuration utility and copy the script steps. You will notice that MirrorSync has already written the entire sync script for you, all you need to do is paste the script steps into your FileMaker database under the 'MirrorSync' script.


After you paste in your script steps, you will run the sync and you are ready to go!
Here is our MirrorSync video tutorial where Jesse demonstrates how to implement the sync between FileMaker and WordPress.
We hope you enjoyed this article. If you are ready to begin syncing FileMaker with WordPress, visit the MirrorSync page to purchase your FileMaker Server to SQL database configuration or email us at infobox@360works.com for a 14-day trial of this configuration.